Using Adobe Lightroom 6 For Editing Photos & Do You Really Need To Do This Editing Malarky?
 (By the way, Lightroom 6 is also known as Lightroom CC 2015. The former is the version if you buy it on DVD disc; the latter is the online version, which you download, via subscription, from Adobe's website).
Okay, let's get started...
Using Adobe Lightroom 6 For Editing Photos
1. Import Photos
1.1 Transfer Images... Insert your Memory Card into your computer's card reader (whether it's integrated into your machine, or you're using a plug-in USB memory card reader).
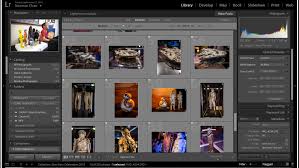
1.2 Start The Import Process, In Lightroom... In the Library tab (accessed via the top-right set of links, in Lightroom 6), click on the "Import... " button.
1.3 Add Keywords... At this point, I add keywords to all applicable photos, which can be found over in the "right panel" of Lightroom. I do this so that I can quickly find the photos later (I may not be ready to process the images, at the time, so I often get the images into Lightroom, so they're ready to be worked on when it's more convenient). It's much quicker to click the keyword label over in the "right panel" in Lightroom, than it is to go hunting through random folders to find out where the heck Lightroom deposited them.
1.4 Import Your Images... Over in the "right panel", click the "Import" button (you'll find the button in the bottom-left corner).
You're now ready to begin developing / processing / editing (whatever you want to call it) your photos...
2. Develop Photos
2.1 Switch To The Develop Module... When you import images, you'll be in the "Library" module. However, you will need to be in the "Develop" module, in order to use the processing tools. So, click the label that says "Develop", from the menu at the top-right of Lightroom's interface.
2.2 Selecting A Photo To Edit... From the "film strip" (running along the very bottom of Lightroom 6), click on a photo that you would like to edit, and it should display in large, in the center of Lightroom.
Now, before I go through the following editing process, I need to point out that this is "my" way of editing photos in Lightroom 6; there are many ways you can approach this task; this is the one I use all the time, at present, so I'm going to explain what I do. However, once familiar with the various tools, you may find your own method works more intuitively for you, so I encourage you to keep an open mind as you go through this process of developing photos, and see if you find a better method for yourself. I should also point out that I'm not totally technically savvy when it comes to using Lightroom. I was shown how to use it and I've mostly been using the same method, albeit I tweaked things slightly to my preferred way of working. I can't explain why this method works, all I know is it works well enough for me, so this is what I continue to do...
2.3 Adjustments I Do For Multiple Photos At Once... There are some settings that I know that I'll use for every single photo that I edit. So, to save an enormous amount of time, I take the first photo in the film strip, and make the following adjustments.
Change Aspect Ratio... You don't have to do this, but I quite like photos with a widescreen Film/TV look to them (maybe it's just a phase I'm going through). Anyway, over in the right panel, at the very top (above the Basic panel of options), there is the "Crop Overlay" tool. Click the icon and a sub menu drops down. To the left of the padlock icon, there should be a drop down menu of aspect ratio options, labeled "Original". I click on this, and then select "16 x 9". If I need to, I will reposition the image, by clicking on it, holding down the left mouse button and dragging the image to where it looks best. When I'm happy, I click the "Done" button, in the bottom right of the image window.
Basic Menu Settings To Change... I drag the 'Highlights" slider to the very left (-100), and the "Shadows" slider to the very right (+100).
Tone Curve Menu Settings To Change... At the very bottom of this menu block, there is an option to change the "Point Curve". It typically displays "Linear", by default. I often find I get very good results when I switch to "Strong Contrast", but keep an open mind about testing your image with "Medium Contrast".
Effects Menu Settings To Change... I add a very subtle dark "Post-Crop Vignette" to virtually all of my images, to help keep the center of the image subtly lighter, by contrast - this just has a slight psychological effect of pull the eyes inwards, towards the main focal point in your images. To speed up this process, rather than dragging the "Amount" slider, I just click the area in the slider, directly underneath the letter "h" or "l", of the "Highlight Priority" label. This tends to give me the most reliable amount of dark vignetting, that isn't either too strong nor too non-existent. But, as always, experiment and see what works well for your images).
2.4 Applying Changes To Multiple Photos... At this point, I'm ready to apply these changes to ALL of my other photos - there may only be a handful or less; there may be hundreds. First, still within the "Develop" module, I click on the "Copy... " button, that's at the very bottom-left of the "left panel" (just above the first two thumbnails on the film strip). A dialogue will pop up, with a tick-box menu of all the settings you may want to copy to the clipboard (ready for pasting to all your other images). At this stage, I usually leave all the boxes checked and just click "Copy". Then, I click on the very next photo in the film strip, hold down the Shift key on my keyboard, then click the very last image in the film strip, so all the remaining images are selected. Then, I right-click on one of the highlighted thumbnail images, go into the "Develop Settings" option, and click on "Paste Settings". It may take a few moments to process all the changes, depending on how many photos you have, and how fast your computer's process is. But that's the first major job, done. Next, I go into the individual images and make further adjustments, to refine and enhance each photo.
2.5 Editing & Refining Individual Images... Again, there are multiple menus and options to work through, and I tend to do it in the following order:
Basic Menu Settings To Change... I hold the Shift key down and double click on the label named "Whites", and then repeat the process with the label named "Blacks". If I feel I need to adjust the Exposure, Contrast, and Temp (Color Temperature), I click and drag these respective sliders, eyeballing the changes, to decide how much to add or remove (or whether the image doesn't actually need any of these adjustments). I do those changes before I look to see if increasing the both the "Clarity" and the "Vibrance" help to enhance my image further - if they do, great; if not, I double-click on their labels (to the left of each slider), to reset these settings.
HSL Menu Settings To Change... This is often experimental. I look at the colors that are in the image I'm working on, and then move the applicable sliders, to see if it helps to further enhance the image. For instance, if there are trees with green leaves, I will know that I might be able to enhance the image by move the "Green" slider in the Saturation, and Luminance tabs, from within the HSL Menu. The Saturation makes colors more rich, vivid, and deep; while, the Luminance helps make the colors lighter or darker. I'm no color expert - I just eyeball the changes as I move the sliders; if things look better with a move to the left or right, I keep moving the slider until it doesn't look quite right. Most of the time, subtle changes are all that's needed. It all depends on what you're trying to achieve with your photos - there may be times when you deliberately want to create garish colors, for a more arty look to your photos? Perhaps you're looking to create more surreal photographic artwork, rather than a realistic portrayal of what you actually saw when the photo was taken. The only rule that I go by is: "the end result must look good, for its intended purpose." I find that mindset helps keeps my creative juices flowing.
And that's it. That, for me, would be ONE image processed or edited (however you want to describe it).
2.6 Exporting Images... Click on the "Library" module and click to highlight the photo(s) you want exported to a folder on your computer. Next, click the "Export... " button, in the left panel, typically above the first few thumbnail images in the film strip. At this point, a dialogue box will appear, with multiple options for exporting your images. I tend to use this for turning my RAW files (the photos I've just processed) into JPEG files, which I will then either chop up and further play about with in an image editor, such as Adobe Photoshop Elements, or, if I don't need to do anything further with them, I can upload them directly to my image hosting account (I use Zenfolio), which can then be used as I need (either sell the photos through Zenfolio, or embed them on one of my websites). I export images in the following manner:
- Choose Export Location... I make sure the "Export To:" option is set to "Specific Folder", then I click "Choose... ", and select a folder on my computer (actually, on an external hard drive) in which to save my JPEG file.
Choose File Naming Options... I often choose to rename the filename that was applied when my image was imported to Lightroom. For instance, I make sure the box is checked, to the left of the "Rename To:" label. If I have more than one image of a similar type, I will make sure the "Custom Name - Sequence" option is selected, from the drop-down menu, to the right of the "Rename To:" label. Then I enter my preferred filename, in the "Custom Text" field.
File Settings Options... Image format, for me, is pretty much always "JPEG". I don't like loss of quality, so I always have "Quality" set to 100 (I have plenty of storage space, so don't care about having bigger files - I want maximum detail retained. Again, this is just a personal choice). And the "Color Space:" option is set to "sRGB".
Image Sizing Options... If I want the full size Lightroom file, so I can manipulate it in Photoshop, I won't check the box to the left of the "Resize to Fit:" label. However, if I know I'm just going to need the same photo, but just at a specific size, I make sure that box is checked, and I enter the dimensions (pixels is my preferred measurement size, but that's just from my work with websites - you can also choose inches or centimeters). Finally, for "Resolution", the common printing standard is 300 "pixels per inch"; while, 72 pixels per inch (ppi) is the resolution recommended if you're just publishing to the internet.
Post-Processing Options... I have the "Do nothing" option selected, where you're asked what you want Lightroom to do "After Export:" has been completed.
And that is it. That's my process for editing and exporting images, using Adobe Lightroom 6.
Do You Really Need To Use Software, Like Lightroom, To Edit Photos?
The short answer is, "no". You don't "need" to edit photos. For a while, when I had my first, sophisticated, DSLR-type camera (a Panasonic FZ1000), I didn't want to be sitting in front of a computer, moving sliders about to tweak photos. I just wanted to be out there, taking the photos and then letting the camera convert them straight to JPEGs, so I could then publish them to one of my websites. However, once I was shown the above process for processing / editing photos, I was amazed at how much detail I was missing out on, by converting images from the camera, straight to JPEGs. Now that I've got my editing method worked out, I find it doesn't take that much extra effort to process even a few of hundred images (not with the speedy features of Adobe Lightroom), and the enhanced detail always makes me glad I made the extra effort.
So, you might not "need" to use software, such as Lightroom, to process and edit your photos, but you just may well "want" to. I guarantee, you'll be astounded at how much better your photos will look, if you take the extra steps (outlined above), to develop your digital images, properly, by shooting all your photos in RAW, and using a program like Lightroom, to edit them.


Comments
Post a Comment